
How Colored Pencils Are Made for Art Students
Colored pencils are far more than just a childhood staple or a casual sketching tool. For art students, they are precision instruments—capable of layering, blending, and capturing fine detail. But have you ever wondered what goes into making these vibrant tools? From the selection of pigments to the final sharpening, the journey of a colored pencil is a fascinating blend of chemistry, craftsmanship, and industrial design.
In this article, we’ll take you behind the scenes of how colored pencils are made, with a focus on the materials, techniques, and manufacturing processes that make them ideal for artistic use. Whether you’re a student, a manufacturer, or simply an art enthusiast, this comprehensive guide will give you a new appreciation for these colorful tools.
What Makes Colored Pencils Different?
Unlike graphite pencils, which rely on a mixture of clay and graphite for their core, colored pencils contain a mix of pigments and binders. This difference is fundamental. The core of a colored pencil is designed to lay down color, not just tone. That means it must be soft enough to release pigment easily, yet firm enough for control and precision.
There are two primary types of colored pencils: wax-based and oil-based. Wax-based pencils are more common and offer a smooth, blendable texture. Oil-based pencils, on the other hand, tend to be firmer, allowing for finer detail and less smudging. Each has its advantages, and the choice often depends on the artist’s technique and preference.
Step-by-Step: How Colored Pencils Are Made
The manufacturing of colored pencils involves several precise stages. Each step plays a critical role in determining the pencil’s quality, performance, and durability. Let’s break down the process.
| Stage | Description |
|---|---|
| 1. Pigment Selection | High-quality pigments are chosen for their lightfastness and vibrancy. |
| 2. Binder Mixing | Binders like wax or oil are mixed with the pigments to form a paste. |
| 3. Extrusion | The paste is extruded into thin rods, forming the pencil core. |
| 4. Drying and Hardening | Cores are dried and cured to achieve proper hardness and durability. |
| 5. Wood Casing | Wood slats are grooved, and the cores are glued in place. |
| 6. Shaping and Finishing | Pencils are shaped, painted, stamped, and sharpened. |
Core Ingredients: Pigments, Binders, and Fillers
At the heart of every colored pencil is its core—commonly referred to as the “lead,” though it contains no actual lead. This core is a carefully engineered mixture of pigment, binder, and filler.
- Pigments: These are natural or synthetic colorants that give the pencil its hue. Artists often look for pigments with high lightfastness, meaning they resist fading over time.
- Binders: These are the glue-like substances that hold the pigment together. Wax and oil are the most common binders. According to Hong Zin Tai, binders like polyvinyl acetate or gum arabic are also used in some formulations to improve consistency and application.
- Fillers: These inert substances (like kaolin clay or talc) add volume and adjust the texture of the core. They can influence how soft or hard the pencil feels during use.
The exact formulation of these ingredients can vary greatly between manufacturers and product lines. Premium brands often use a higher ratio of pigment for more vibrant and consistent color application, which is especially important for professional use.
Mixing and Extruding the Core
Once the raw materials are selected, they are mixed together to form a thick, dough-like paste. This mixture must be perfectly balanced—not too dry, not too oily. It’s then extruded through a die to create long, thin rods. These rods are the pencil cores.
Extrusion is a delicate process. If the mixture is too soft, the core may crumble during use. If it’s too hard, it won’t lay down color effectively. After extrusion, the cores are dried and sometimes baked to remove excess moisture and harden the material.
As noted by Luuk Minkman’s article, this stage is crucial for ensuring the core’s durability and consistency. Even slight variations in temperature or humidity can affect the final product.
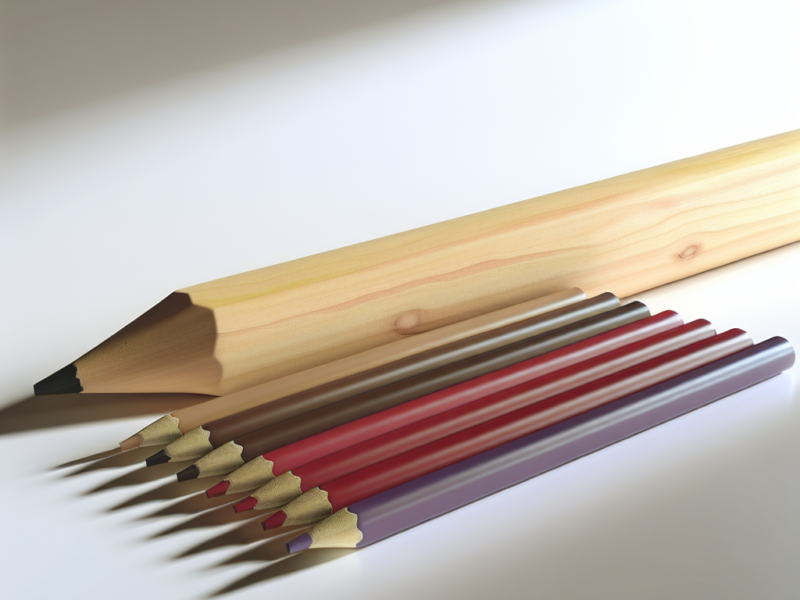
Wood Selection and Casing
While the core delivers the color, the wood casing provides structure and usability. Most colored pencils are made using cedarwood, which is soft enough to sharpen easily but strong enough to protect the core. Manufacturers often use slats of pre-cut wood that are grooved to hold the cores.
The cores are inserted into these grooves and glued in place. Another slat is placed on top, sandwiching the core inside. This “pencil sandwich” is then pressed together and left to dry. Once the glue has set, the pencils are cut into individual sticks and shaped—usually into a hexagonal or round profile.
Some brands also use alternative woods or recycled materials to reduce environmental impact. For art students who prefer eco-friendly supplies, these options are increasingly popular.
Finishing Touches: Painting, Stamping, and Sharpening
After shaping, the pencils go through a finishing process. They are painted—often with a color that matches the core—and stamped with branding, color codes, and product information. Some pencils are dipped in lacquer or varnish for a glossy finish.
Finally, the pencils are sharpened and packaged. Quality control checks are performed throughout the process to ensure that each pencil meets standards for color consistency, core alignment, and structural integrity.
Why Material Quality Matters for Art Students
For art students, the quality of colored pencils can have a direct impact on their work. A pencil with a poorly formulated core may break easily or produce uneven color. On the other hand, a well-made pencil allows for smooth blending, precise layering, and reliable color payoff.
According to Alabama Art Supply, the choice of materials—especially the type of binder and pigment concentration—plays a key role in how the pencil performs on paper. For students developing their technique, these differences can be significant.
Here are a few practical tips for art students choosing colored pencils:
- Test for blending: Try layering colors to see how smoothly they mix.
- Check for breakage: Sharpen the pencil and apply pressure during use; quality pencils should resist breaking.
- Look at lightfastness: Choose pencils rated for high lightfastness if your work will be displayed or sold.
Innovations in Colored Pencil Manufacturing
As demand for high-performance art supplies grows, manufacturers are exploring new materials and technologies. Some brands are experimenting with biodegradable casings, water-soluble cores, or hybrid oil-wax binders to improve usability and environmental impact.
For OEM manufacturers, this presents an opportunity to differentiate products through innovation. By understanding the science behind colored pencil formulation, suppliers can tailor their offerings to meet the specific needs of students, professionals, and hobbyists alike.
Conclusion: The Craft Behind Every Stroke
From raw pigments to sharpened tips, the making of a colored pencil is a nuanced and highly technical process. For art students, understanding how these tools are made isn’t just a curiosity—it’s a way to make more informed choices about the materials they use every day.
Whether you’re sketching in a classroom or preparing a portfolio, the quality of your colored pencils can shape your artistic journey. And now, with a deeper appreciation of what goes into making them, each stroke of color holds a little more meaning.